Pro AV News and Tech Tips
HOW TO CONTROL AUDIO FEEDBACK
Feedback is that piercing screech or hum that is sometimes heard during live events involving microphones. Feedback is almost always an undesired sound in most audio systems. If you want to be able to control the problem, you first need to learn what feedback is and what causes the phenomenon.
WHAT IS FEEDBACK?
Also known as audio feedback, acoustic feedback, and the Larsen effect, it is a positive feedback loop that exists between an audio input and the audio output of a loudspeaker system.
You can easily cause feedback yourself by pointing a microphone (audio input) directly at a close by loudspeaker (audio output). This will cause the preamp and amplifier to repeatedly amplify the sound of the loudspeaker picked up by the microphone, causing a loop, which is what we hear as feedback. Although, feedback occurs at one frequency at a time, there can be multiple instances of feedback and harmonies occurring at the same time.
An ample gain level and stable oscillation follows the Barkhausen Stability Criterion's conditions for a feedback loop.
Barkhausen Stability Criterion
In electronics, the Barkhausen criterion is a mathematical condition to determine when a linear electronic circuit will oscillate. The phenomenon was discovered in 1921 by German physicist Henric Georg Barkhausen while studying feedback oscillators. The criterion—a principle or standard by which something may be judged or decided—is used in designs of electronic oscillators and general negative feedback circuits, such as op amps, to prevent oscillating.
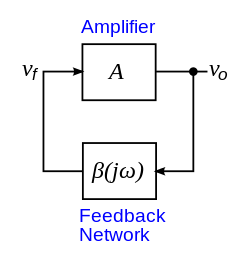
The Stability Criterion states: if A is the gain of the amplifying element in the circuit and β(jω) is the transfer function of the feedback path, so βA is the loop gain around the feedback loop of the circuit, the circuit will sustain steady-state oscillation only at frequencies for which:
- 1. The loop gain is equal to unity in absolute magnitude, that is |βA|=1 and…
- 2. The phase shift around the loop is zero or an integer multiple of 2π: <βA=2πn, nε 0,1,2,…
This phenomenon is a necessary condition for oscillation. Although some circuits satisfy the criterion, they do not oscillate.
Limitations
While studying feedback oscillators, Barkhausen developed a "formula for self-excitation": KF(jω)=1 where K is the gain factor of an amplifier and F(jω) is the frequency dependence of the feedback loop.
Barkhausen's criterion applies to linear circuits with a feedback loop. The core of the criterion is that a complex pole pair needs to be placed on the imaginary axis of the complex frequency plane if steady state oscillations take place. But it is not possible to balance on the imaginary axis in the real world, so a steady-state oscillator must be a nonlinear circuit.
Nevertheless, before stable nonlinear systems were well understood, only a single value of K was believed to separate stable and unstable behaviors in these systems. Originally, this equation was used to determine the oscillation frequency of radio transmitters. The self-excitation formula involved an equality sign |βA|=1. It was believed that this gave the boundary between stability (|βA|1) and instability (|βA|≥1). Stable oscillations only occur at frequencies for which equality holds. Therefore, Barkhausen's criterion is falsely stated as a stability criterion.
The 4 Major Factors That Affect Feedback
- Distance
- Directivity
- Frequency Response
- Gain Structure
Sound Pressure Level (SPL) drops with an increase in distance (inversely proportional). The closer together the input (microphone) and output (speaker), the higher the chances are that feedback will occur. To maximize gain before feedback, the mic and speaker must be as far apart as possible. Keeping the loudspeakers appropriately far from the stage will help.
Directivity
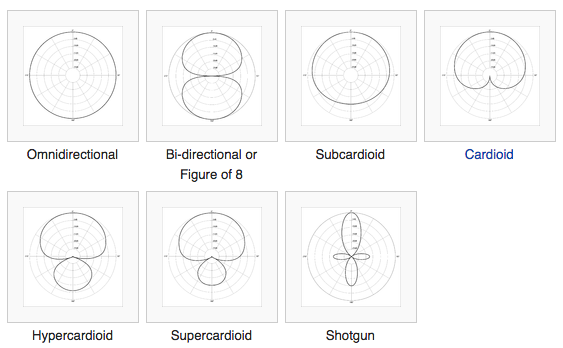
The tighter the directivity of the speaker and mic polar pattern, the lower the chance of feedback. It is very useful to know the nominal direction of your loud speakers and the polarity and degrees of your microphones. Some mics can even pickup sound well from directly behind the mic (i.e. supercardioid, hypercardioid, omnidirectional, bidirectional).
Frequency Response
Most microphones are not engineered to be a true, flat response. Certain models of mics respond differently to various frequencies. For example:
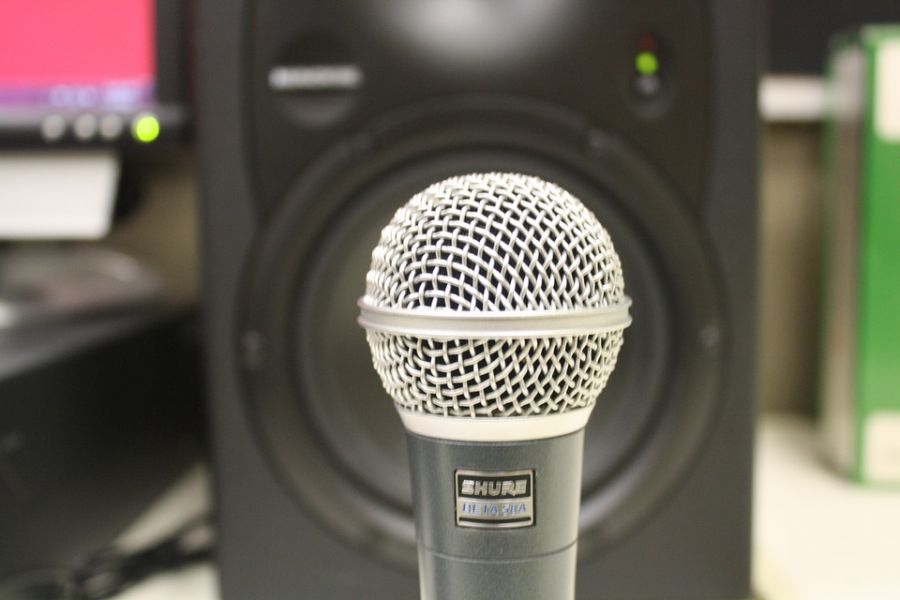
- at 4kHz – 6kHz a Shure SM58 (cardioid, dynamic) has a frequency response of +5dB
- Neumann KM 183 (omni, pressure transducer) has a peak +8dB @ 10kHz
- KM 185 (hypercardioid, pressure gradient condenser) has a +4dB peak @ 10kHz and a shelf high pass starting around 400Hz
- Beyerdynamic M500 (hypercardioid, dynamic ribbon) @ 100cm has a +8dB peak @ 10kHz and 5kHz and a steep shelf high pass @ 125Hz
In addition to microphone frequencies, room modes can cause feedback issues as well. Room modes are a collection of resonant frequencies at which the acoustic response from an acoustic source, such as a loud speaker, varies depending on the shape and dimensions of a room. These problem frequencies of a room cause standing waves. The antinodes (maximum pressure) and nodes (zero pressure) of standing waves might result in feedback if the mic source is placed at an antinode.
Gain Structure
Gain is the parameter for an amount that an amplifier circuit is going to increase the amplitude of an input signal. Gain typically affects signal input.
Setting the system gain to the highest point without feedback is the maximum gain achievable—ringing out the system. You can achieve more gain before feedback by paying attention to microphone placements relative to the loudspeakers.
How to Apply These 4 Factors
An effective method to figure out trouble frequencies that will cause feedback is to ring out the system. To ring out the system is a process in which the gain for each microphone is turned up until feedback just begins, and then turning it back down a few dBs. After this has been done for each microphone individually, repeat the process, but this time with all of the mics on. If ringing or feedback is still heard, attenuate the master level.
My quick method for ringing out the system for smaller gigs is to set each microphone and main channel fader to 0dB or unity. I then turn up the gain for each mic one by one until it reaches a desired level or I start to hear feedback, I would then pull the trim back until it stops. As I do this for each mic, I leave the previously tested mics on. This method of setting your channel faders to 0db is an effective method for checking feedback issues as well as being an aesthetically pleasing and practical mixing position; all of your channels are set in the same fader position and you'll have room to boost or attenuate levels. Be aware though, you are typically performing sound checks at a time when the venue is empty. Acoustically, human bodies can affect sound through absorption, diffusion, and raising room temperature.
Another effective method for achieving desirable sound throughout the room is a method called tuning the room or ringing out the room. When tuning a room, equalization (EQ) is one of the most beneficial approaches. EQ is often done with an audio spectrum analysis tool such as a RTA (real-time analyzer). Pink noise is most commonly used and sent through the sound system with a tone/noise generator, and a flat response measurement microphone captures the audio reproduced by the loudspeakers throughout the room. The RTA shows frequency anomalies, which can then be theoretically flattened with an equalizer. Pink noise is typically used for acoustic measurements because it is equal energy per octave or 1/3 octave and is the most natural sounding colored noise to human ears.
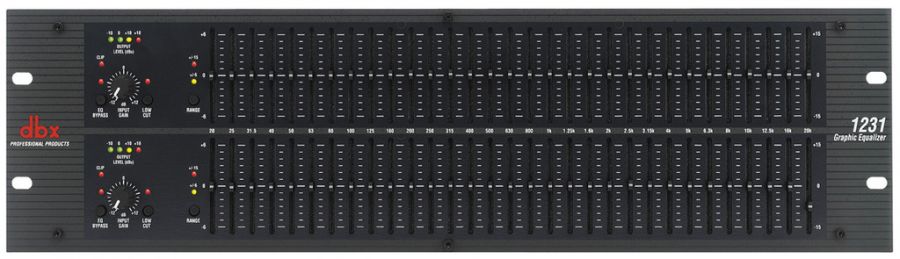
By using an RTA with a range of 1/3 octave and a 31-band graphic equalizer—generally 1/3 octave gaps—the frequency ranges of the RTA should match those of the EQ. Although, a parametric EQ will give more flexibility to pinpoint frequencies.
RTAs are typically more effective for electrical measurements rather than acoustical. This is due to environmental and time factors, such as early reflections and reverberation. These acoustic reflections can cause incoherent phasing. RTAs are not able to hear or distinguish phasing issues.
"The most accurate tool you have is your ears."
How Do We Start to Fix This?
First, take measurements from multiple locations around the room, then look and compare the differences in curves shown on the RTA.
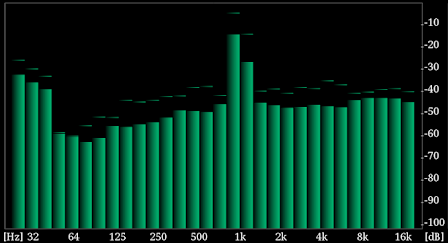
If we use an RTA and get results such as the image on the right, we can see that there is a spike in frequencies at 32Hz and 1kHz and a dip around 64Hz. The problem looks like it could fixed by simply using an EQ to boost the frequencies. But the problem could be more complicated than just using an EQ. There might be issues with phasing because two adjacent speakers are not lined up correctly, crossover errors, possibly room modes, or an HVAC system. It's possible that the system cannot produce frequencies in that range. Full-range sound systems (subwoofer, woofer, mid-range, and tweeter) are capable of reproducing sounds from 20Hz to 20,000Hz. So it's not safe to say that an EQ alone would fix the issue.
Fixing Improper Placement
In most cases, an event will require more than one loudspeaker. You need to be able to cover the venue/location sufficiently enough to have proper speech intelligibility, full range (if using videos or music), and enough power to provide proper SPL without overdriving the loudspeakers. Make sure the speaker array is in line with each other, the angle relative to the listener is in an acceptable position, and they're at a proper height to reach listeners.
Fixing Room Modes
While using an RTA and measurement mic as you walk around the room, watch and listen for nodes and antinodes. Standing waves are created from nodes and antinodes. According to an article from the Department of Physics at Rensselaer Polytechnic Institute, a standing wave is "a wave that has crests and troughs at fixed points; the amplitude changes in time, but the locations of crests do not."
Checking Speaker Specifications
Read the loudspeaker's manual and check its specifications sheet. The loudspeaker is limited to its frequency range. So a speaker that is rated from 100Hz – 18kHz shouldn't be expected to reproduce frequencies below 100Hz effectively. You should also be aware of other specs listed such as nominal coverage, max SPL, power output, and frequency response.
Once you gather all the info about the venue, your equipment, and acoustic measurements you can decide how you want to tune your system. Are you going to use a parametric EQ or graphic EQ? Will you EQ each individual channel or just the main mix? Will each channel have a gate to eliminate ambient noise from open mics? Will you EQ all the speakers as one or will each speaker have different processing to accommodate for the venue setup and speaker placement? Also consider using a feedback eliminator, which can help control feedback tremendously.
The most accurate tool you have is your ears. Practice your aural skills and learn to identify different frequencies.
When you subscribe to the blog, we will send you an e-mail when there are new updates on the site so you wouldn't miss them.